My friend Judith started sewing a little while ago and really got into it. I am always excited when any of my friends pick up sewing as a hobby as I love to see what ideas other people come up with and the things they create.
A couple of weeks back Judith asked me if I could help her figure out how to recreate an apron she had seen, for her friend. She would like to make it as a Christmas present for her and didn't know where to start. I thought that was a very sweet idea and I liked the look of said apron myself which led me to making myself one, taking a few pictures along the way for Judith.
Since Christmas is sort of around the corner for anyone planing to make any presents by hand, I thought I'd share her "tutorial" here. I hope this is helping a few of you readers who are still thinking about what to make for Christmas. It's a good beginners project.
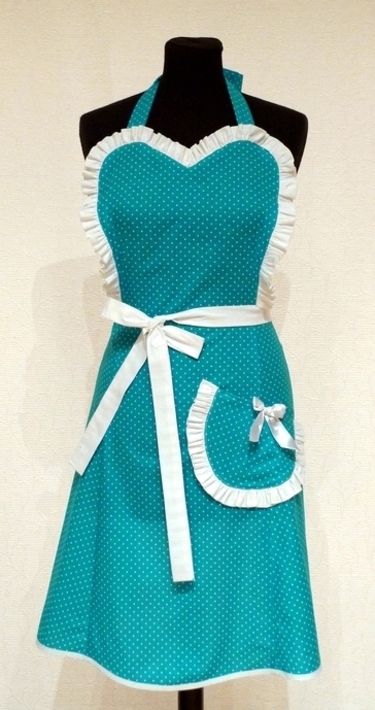
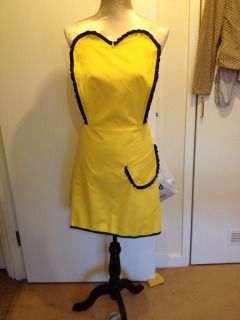
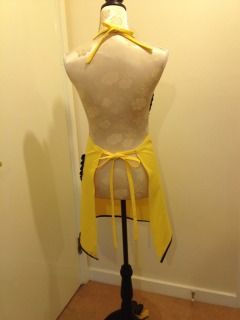
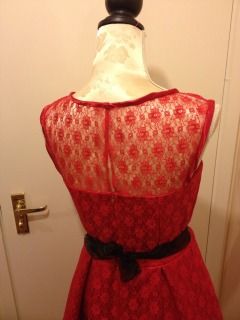
This is the picture of the apron Judith wanted to recreate.
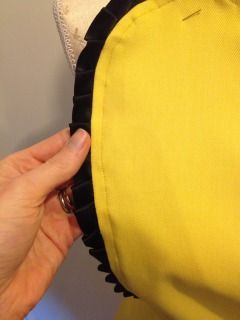
I used this opportunity for some fabric stash busting and went for a yellow and black colour combination.
my version. I hope you can read the measurements. Please adjust where necessary.
I am not very good with fancy computer stuff, so I hope a picture of what pieces to cut helps. I think the original apron is cut as one piece or a middle piece and two side pieces but this layout was the most economical for my fabric scraps and the end result looks the same.
The measurements I used
Top:
12.5" long at center fold
5"wide at waist (for a total of 10")
6.5" wide at the top
I drew the sweetheart free hand
Skirt:
12.5" wide at waist
18" wide at hem
19"long
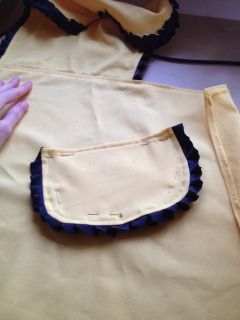
I drew the pocket free hand, the size I wanted it to be
I cut the top on the fold, as well as the "skirt" piece. Not pictured in the pattern are the straps I made from the same fabric. I cut 5cm wide and 50 cm long rectangles (two for the waist strap and one for the neck strap that I cut in half) for that but you could just use ribbon instead. It's less work and works just as well. I just ran out of ribbon.
I used about 1/2m (140cm wide) cotton drill, 2m of 2" satin ribbon (more if you want to use it as and some black bias tape that I had left. This is a very inexpensive project (depending on the fabric you use).
Cut out your pieces.
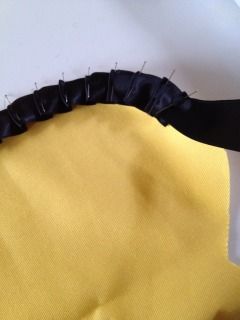
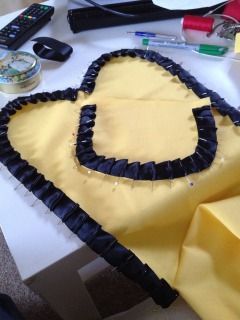
Top with pleated detail: Pin your ribbon onto the top piece around the sides and sweetheart neckline. The right side of the fabric is facing up and you pin all the way around the outside. You can buy pre-pleated ribbon for that. My shop didn't have any so I had to pleat it myself.
pleat all the way around the pocket, too
Stitch all the way around about 1cm from the outer edge. I also zig zagged the raw edges (you can do that before pinning the ribbon on, too. I find doing it after sewing on the ribbon reduces the bulk a bit and also secures the ribbon even more.
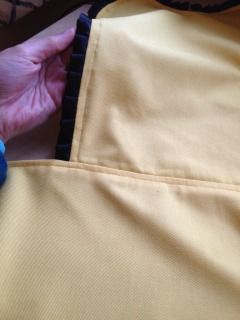
Then fold the ribbon edge around to the back and press. Topstitch all the way around et voila, you have a rushed finish.
Now overlock or zig zag the waist line- edge of your top piece and also the upper edge/waistline of your "skirt" piece.
Pin the top piece to the skirt piece along the waistline (center lines matching, right sides of the fabric facing) sew both pieces together and press seam allowance toward the skirt. Top stitch along the waist of the whole "skirt" for a nice finished edge.
Now you are almost done.
Place your pocket where you would like it to be, pin in place and sew. Hem the sides of the "skirt" and the hem. I finished my hem with bias tape in black to pick up the fabric one more time. You can also apply the pleating as on the bodice to add any other trim.
All that's missing now is the ties and a few finishing touches.
I made my own straps. You can either cut strips of fabric the width and length you want plus hem allowance and sew a double folded narrow hem all the way around.
Or you can cut the strips double the width of the strap plus seam allowance, fold then lengthwise (right sides of fabric facing) and sew along the long side and one of the short sides. Turn them inside out, press and ta da, you have a strap.
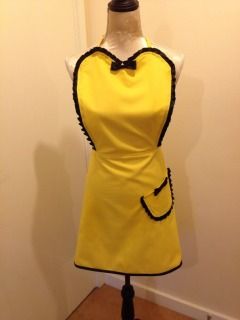
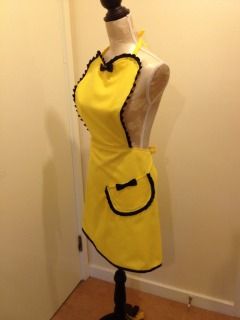
Attach to the top and skirt and you are done. Add bows and other details if you wish and you have your finished apron.
I am not very good at explaining things, hence I never do tutorials. I am lacking the teacher-patience-gene I guess. Thankfully this is a very straight forward project so I hope it all makes sense, especially to beginners, who have not made any clothing yet.
Please send me a picture or a link to your blog if you are making an apron like this. I'd love to see how they turn out.